Painted Farmhouse Desk
Onto another thrift store furniture makeover project! I found a veneer topped wooden desk that needed a little DIY love sprinkled on it. My design plan is to change it into a painted, rustic farmhouse desk. Easy and simple!
Disclosure: If you make a purchase from some links in this post, I may earn a referral fee at no cost to you.
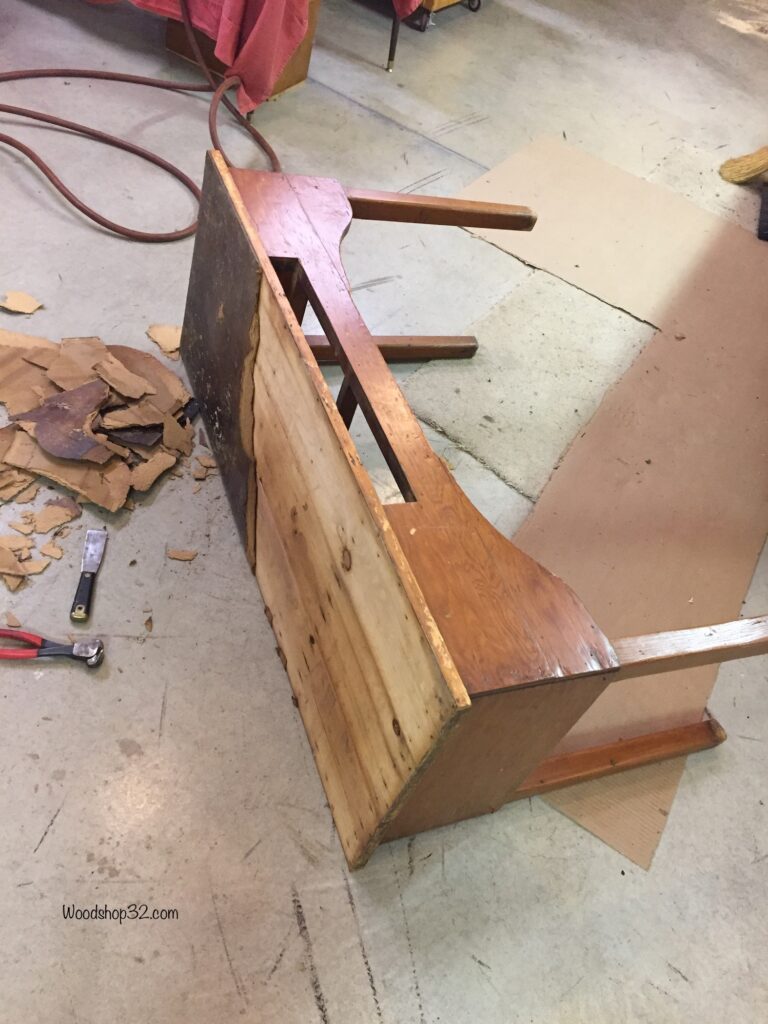
Step 1: Remove Veneer Top
The worn veneer top is removed first. The glue under the veneer was so old and dry that most of the veneer was ripped off by hand. A hammer and putty knife works great for the rest of the removal. I did discover tack nails and removed those also.
Follow Woodshop32.com on Pinterest!
I am thrilled to find nice distressed pine boards under that veneer. Cost savings for sure! The imperfect wood boards add a rustic look I wanted for my farmhouse design. Happy DIY dance!
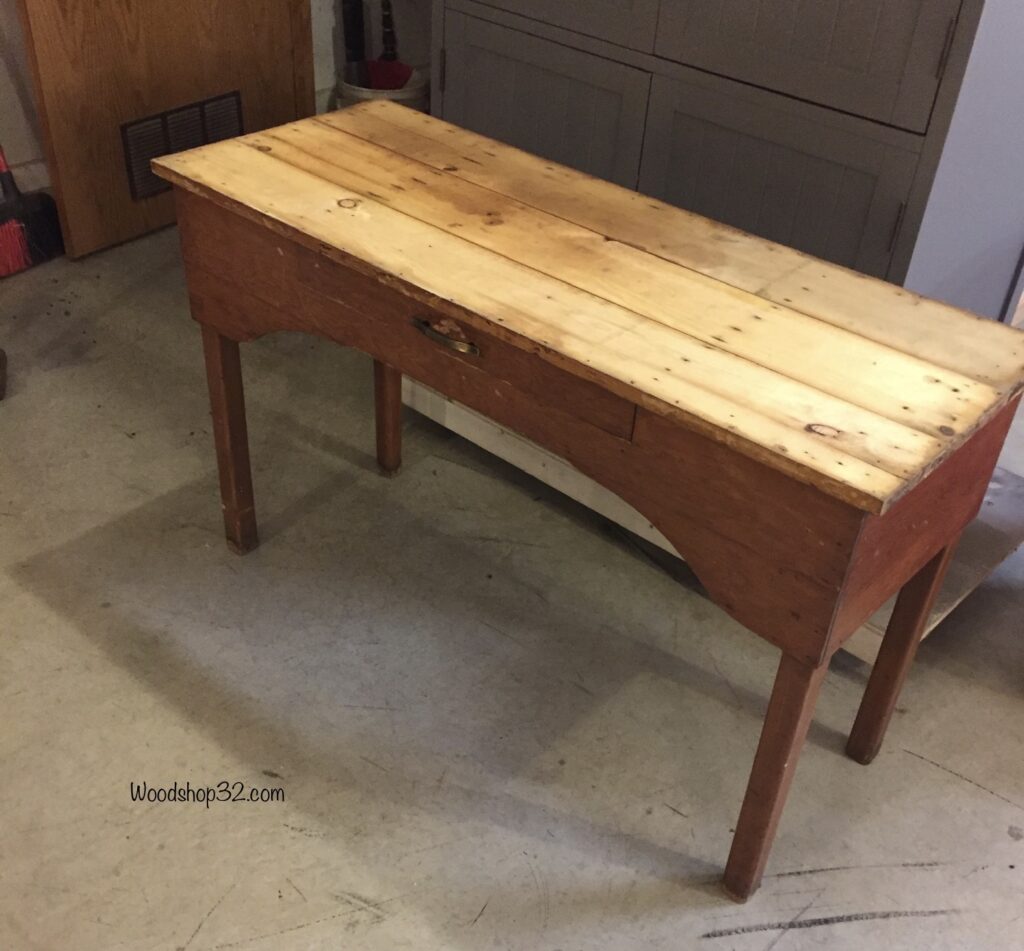
Step 2: Sanding Desk
My trusty palm sander is used for the top pine boards starting with 100, 120, and 150 sandpaper grits to achieve a nice smooth surface. The rest of the farmhouse desk it is sanded using 100 grit. Once done, the sanding dust is removed by using an air compressor with a fine tip nozzle.
Looking for more DIY Makeovers? Click on my other DIY projects: Repurposed Vanity Dresser, Motorcycle Helmet Holders, DIY Dresser Makeover
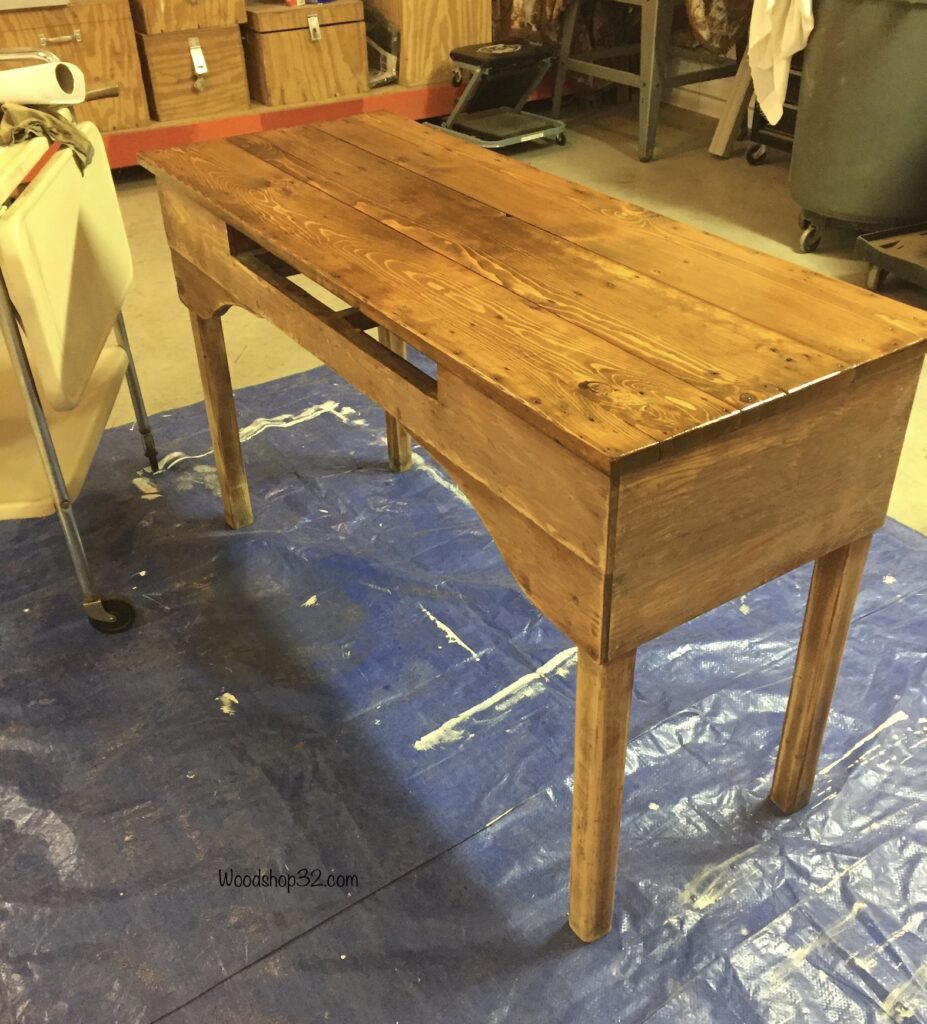
Step 3: Finishing Desk Top
The wood stain is brushed on the desk top and wiped off with a clean cloth. The same procedure is done to the drawer box. I let it dry overnight. To seal the stain color, lacquer is brushed on. Once dry, I gently used 500 grit to rid of any tiny lacquer bumps. The desk top and drawer box are wiped down with a clean cloth and another layer of lacquer finish is applied. Luckily, I have leftover finishing supplies from other DIY projects to use. Another cost savings!
Time to paint this farmhouse rustic desk!
Want to save this post for later? Make sure to Pin It!
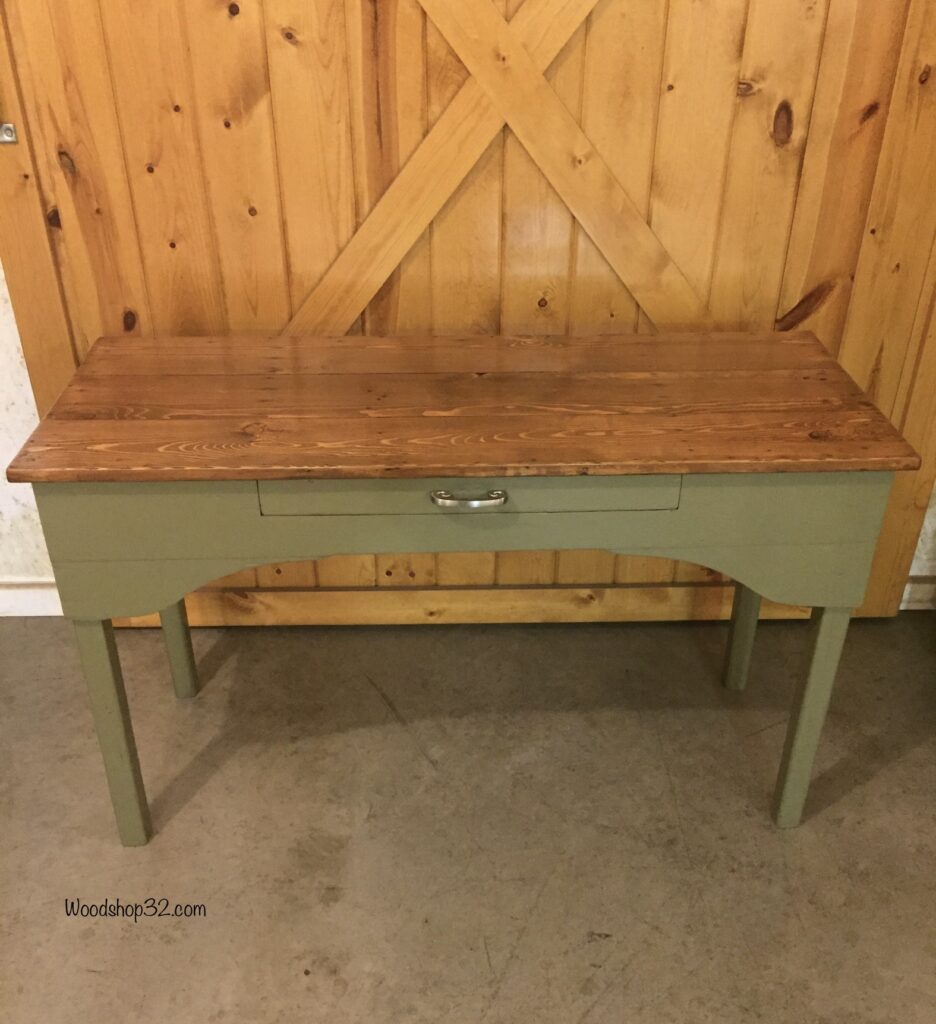
Step 4: Painting Farmhouse Desk
The desk top is covered up with old newspaper to protect it. The drawer is put back in place. The desked is placed on a tarp and is ready for painting.
I bought two cans of spray paint in oregano green but only used 1 1/2 cans. The paint really showcased the natural wear and imperfections in the wood. Once the painting is done, the newspaper is removed from the desk top.
The farmhouse desk makeover design looks amazing! The freshly painted desk is allowed to dry 24 hours before the next step.
Step 5: Additional Makeover Design
Don’t forget about the drawer! Decorative contact paper is added on the drawer bottom for a little extra design. The drawer knob was a clearance rack special. Yea! Another cost savings! I love it when a furniture makeover turns out really good.
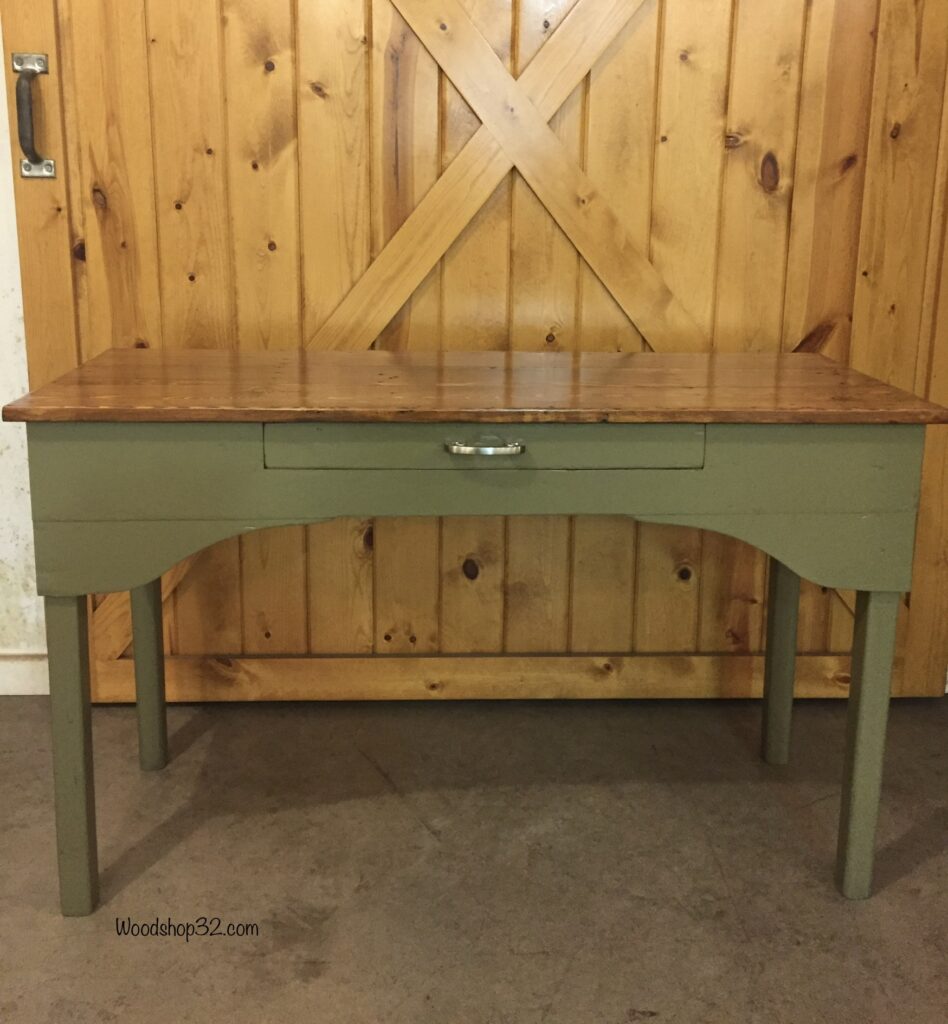
The desk is an easy rustic furniture flip. By keeping all the original imperfections, it really adds to the farmhouse charm of the desk.
Thank you for visiting the Woodshop32.com blog!
I’ve been wondering if veneer could be removed?! I have a dresser to try this on! Thanks!
A heat gun helps in areas where the veneer sticks. Enjoy working on your dresser!