Farmhouse Buffet Cabinet
A farmhouse buffet cabinet makeover project that I am so excited to start. When I first saw this dusty water damaged buffet, I knew it could be restored back into a beautiful show piece one again.
I can just imagine decades ago it was an impressive piece of furniture in the family dining room. It would be been filled with crisp white cloth napkins, fine china, and sparkling silverware. It time for this vintage buffet cabinet to step into the spotlight once again!
Disclosure: If you make a purchase from some links in this post, I may earn a referral fee at no cost to you.
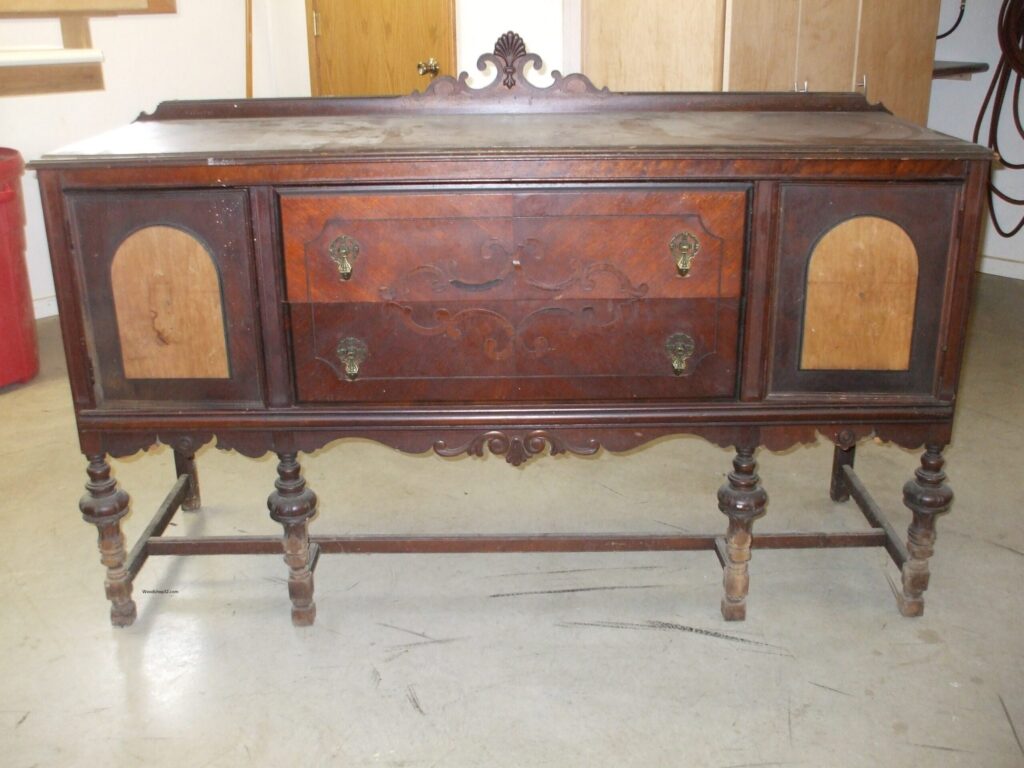
The buffet cabinet is in rough shape. The veneer panels on the doors are so bad and damaged that I ripped them off. The drawer fronts have a decorative veneer design and part of it is missing. I had to cut a veneer strip to fill it in by using the door panel veneer that I ripped off earlier. Perfect match! The piece is glued on and secured with painters tape until it dried.
I can already tell this makeover buffet project is going to be a lot of work. I do love a challenge, it brings out the creative designer in me!
Follow Woodshop32.com on Pinterest!
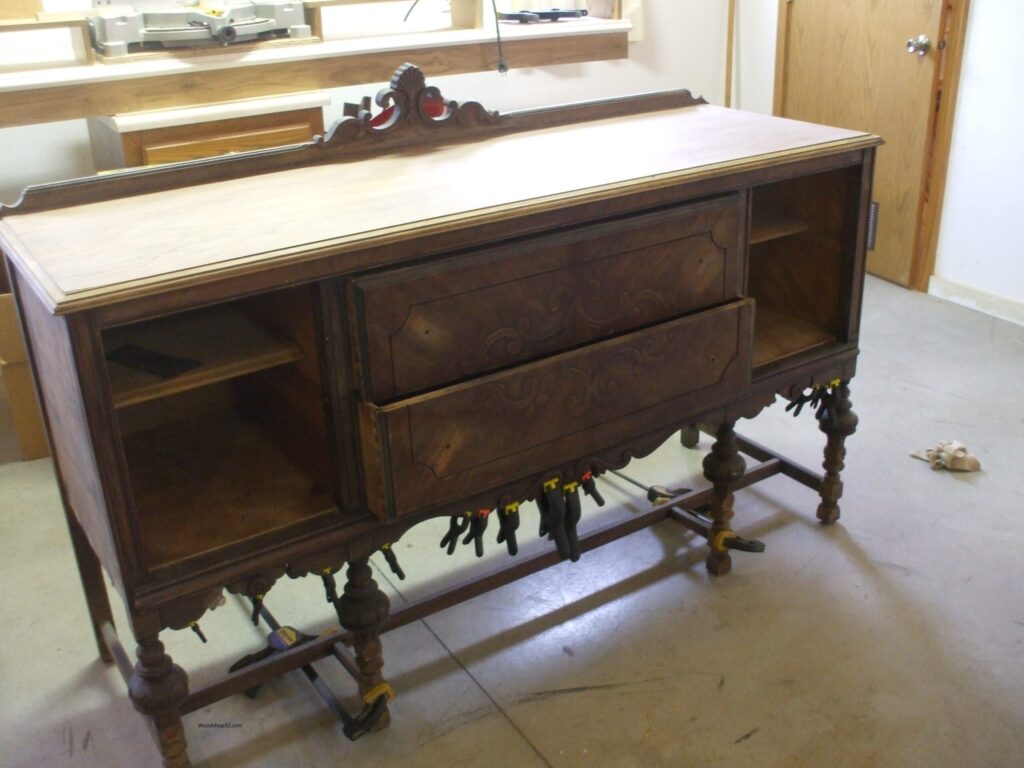
The decorative bottom veneer is coming off so it is wood glued and clamped until dried. So happy this part could be saved! There is no extra veneer material to replace this. Trouble diverted! All of the buffet cabinet joints were re-glued to strengthen the furniture.
The top is a thicker veneer so I was able to sand off the original stain color. Using my Dewalt palm sander, I used 100 grit, 120 grit, and 150 grit sandpaper. The top has a lot of beautiful imperfections that I wanted to keep for the vintage quality of the piece. Sanding by hand for the detailed areas and legs took longer but it was worth it.
Looking for more DIY Makeovers? Click on my other DIY projects DIY Dresser Makeover, Vintage Display Cabinet, Upright Piano Makeover
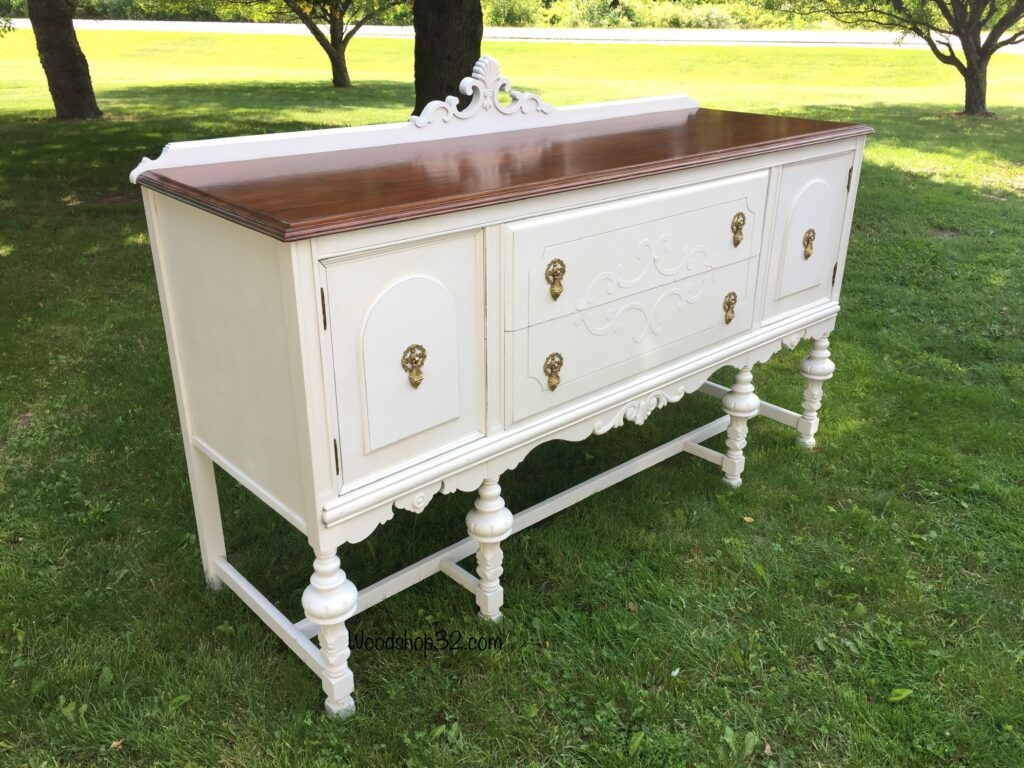
The farmhouse buffet cabinet is really coming together with my design idea. The original hardware handles are extremely compacted with dirt and grime. Once removed, I put them in a pot of boiling water and scrubbed with a small wire brush. Wow! What a difference!
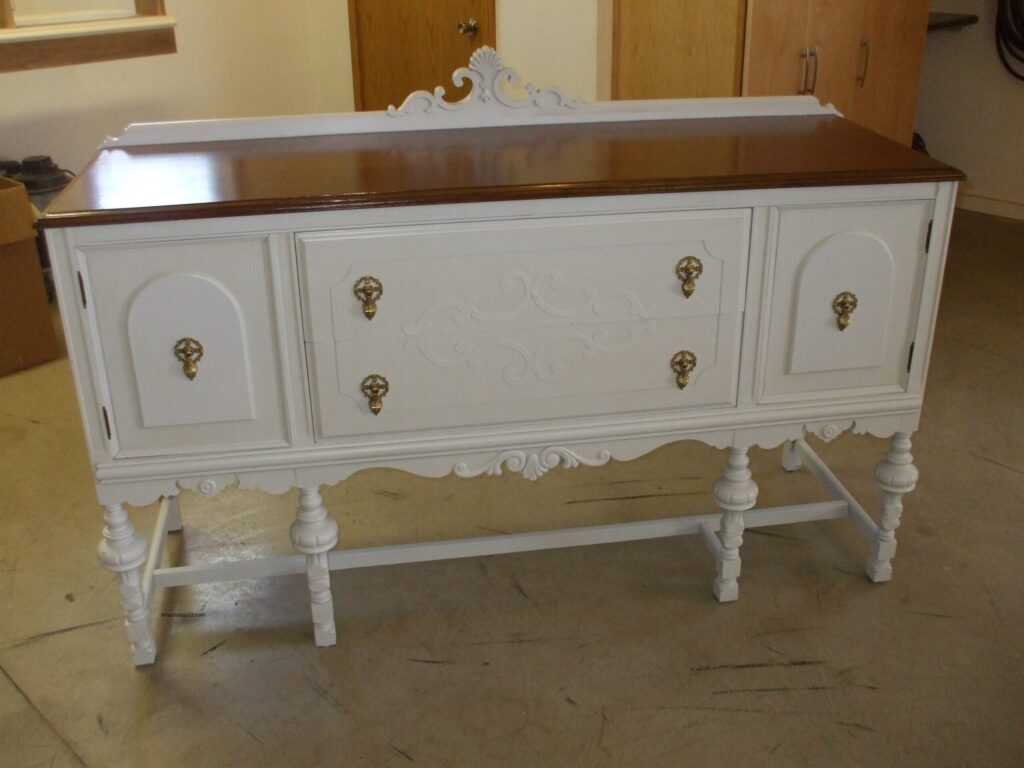
After staining the wood veneer top, I applied three coats of varnish for more durability. The top turned out amazing!
Before painting, I had to apply thin strips of wood to the bottom sides of the cabinet. The veneer was so badly chipped in those areas it had to be covered up but yet match the buffet design.
Want to save this post for later? Make sure to Pin It!
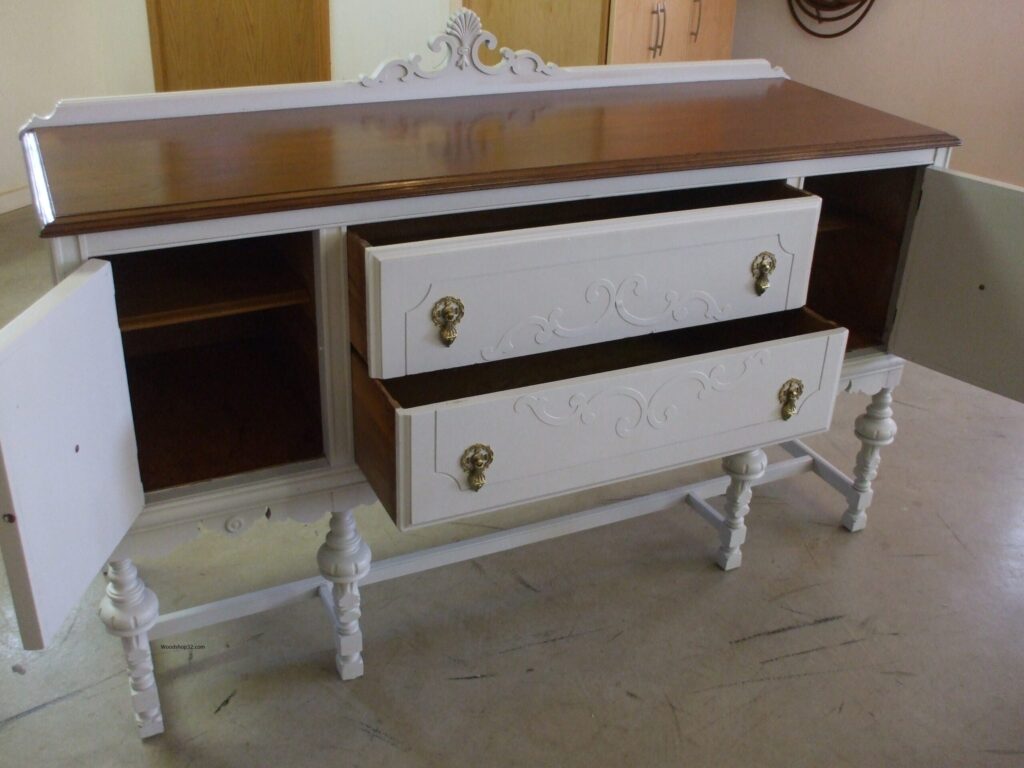
The inside of the doors and drawers are sanded and varnished to show the natural wood color. The stain, varnish, and paint are all leftover from previous projects and the buffet was given to me for free. Total project cost was zero dollars! Yeah!
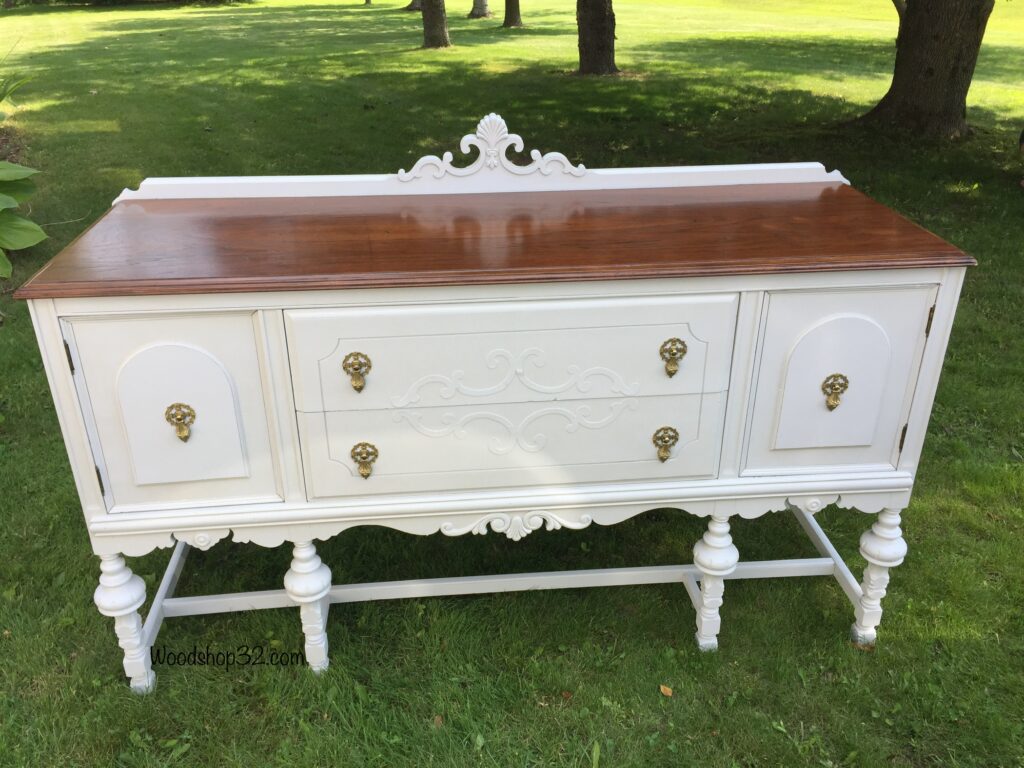
The buffet cabinet restoration turned out beautifully! I am so happy with the results of this project.
The farmhouse buffet cabinet is one of my favorite projects to restore. It was a lot of hard work but so much fun! The farmhouse buffet cabinet has been resorted into a beautiful show piece furniture once again.
Thank you for visiting the Woodshop32.com blog!
Wow! Gorgeous farmhouse piece!
I definitely agree with you!! Love this buffet!