Painted End Table Idea
Are you searching for painted end table makeover idea? I used paint and fabric to repurpose an old end table for an easy DIY furniture flip. Simple DIY idea for beginners!
You may be a little hesitate to combine paint and fabric in a furniture design. Relax. It’s simple!
I found a thrift store bargain table and it’s the typical brown furniture color. Boring. After inspection, I noticed the top is particle board but the legs are solid wood. Since the top can’t be refinished, I had to get creative and bold!
Disclosure: If you make a purchase from some links in this post, I may earn a referral fee at no cost to you.

Sanding End Table
Using a palm sander, the top is sanded with 100 grit only (because the glue will stick better on the surface). The sides and legs are sanded with 100 grit and 120 grit. The table legs are sanded by hand because of the curves. Once the sanding is done, I wiped the end table with a damp cloth to remove the sanding dust.
Follow Woodshop32.com on Pinterest!
Painting End Table Base
The table is placed on it’s top and painters tape is applied to the top underside overhang. Using my handle attachment, the base is spray painted with a bright apple red color. Only two coats of paint is needed to cover the dark stain. My DIY painted end table idea is coming together! I let the pain dry overnight.
Upholstery Fabric
The floral fabric I picked out matched beautifully with the red paint! (Make sure you buy upholstery fabric because it is stronger and easier to work with the glue.)
The upholstery fabric is cut large enough to cover the overhang depth on all sides.
Want to save this post for later? Make sure to Pin It!
Gluing Upholstery Fabric to End Table
The fabric is placed face down on a flat surface. Mod podge glue is brushed onto the brown table top only. The table is placed upside down onto the fabric and pushed down firmly. The table is turned upright onto it’s legs.
The fabric is checked for air bubbles and smoothed down with hands to have a nice flat surface. The table is placed face down on flat surface again. (Fold the fabric over edge the to see if you need to cut more off before gluing.) Mod podge glue is brushed on the brown underside top overhang. The fabric is pulled over the edge and pressed down firmly – one side at a time.
Looking for more DIY Makeovers? Click on my other DIY projects: DIY Dresser Makeover, Vintage Display Cabinet, Repurposed TV Armoire
The mod podge glue is brushed on top of all fabric to seal it. It is easier to brush the underside first then flip table upright to finish top fabric. I only did two coats of it to keep costs down. You can decide how many coats you prefer by following the manufacture instructions for Mod Podge glue.
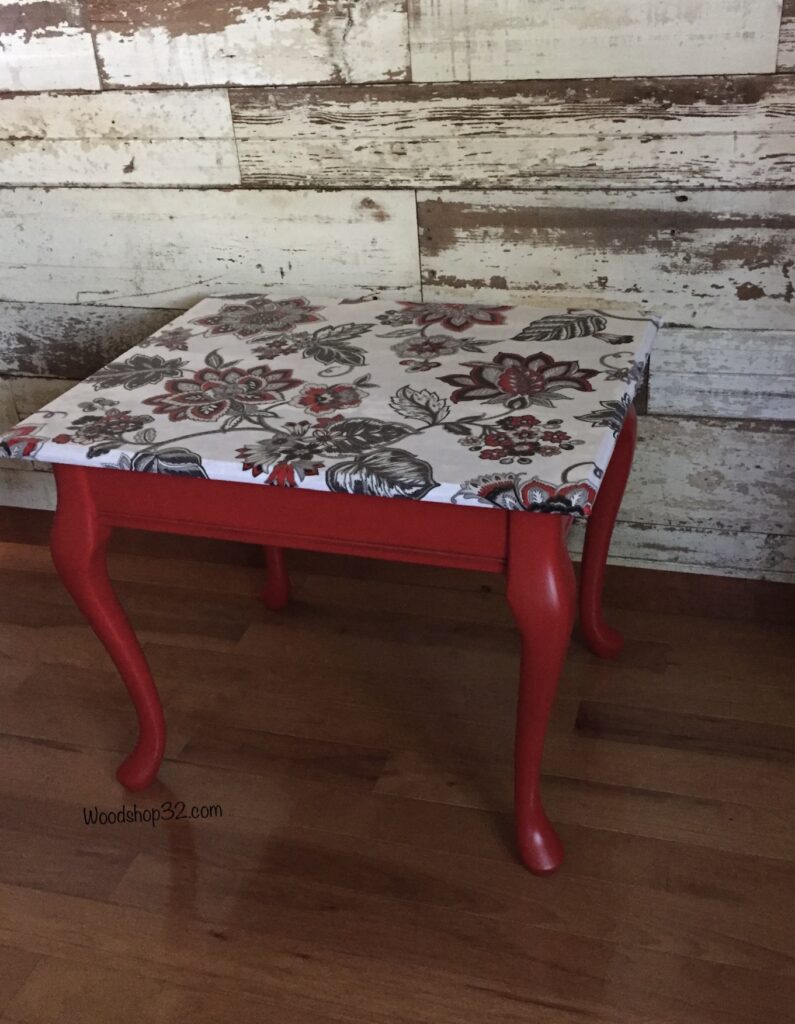
Talk about a dramatic change in appearance! The once boring end table shines brightly with it’s new fabric and bold paint combination. My painted end table makeover idea turned out really good and so simple to do!
On your next DIY makeover project, explore your creativity to think outside the box! Go Bold with Color!
Thank you for visiting the Woodshop32.com blog!
Never though of using modge podge on furniture! Turned out great!
Fabric is another way to explore different patterns in design. Be unique!